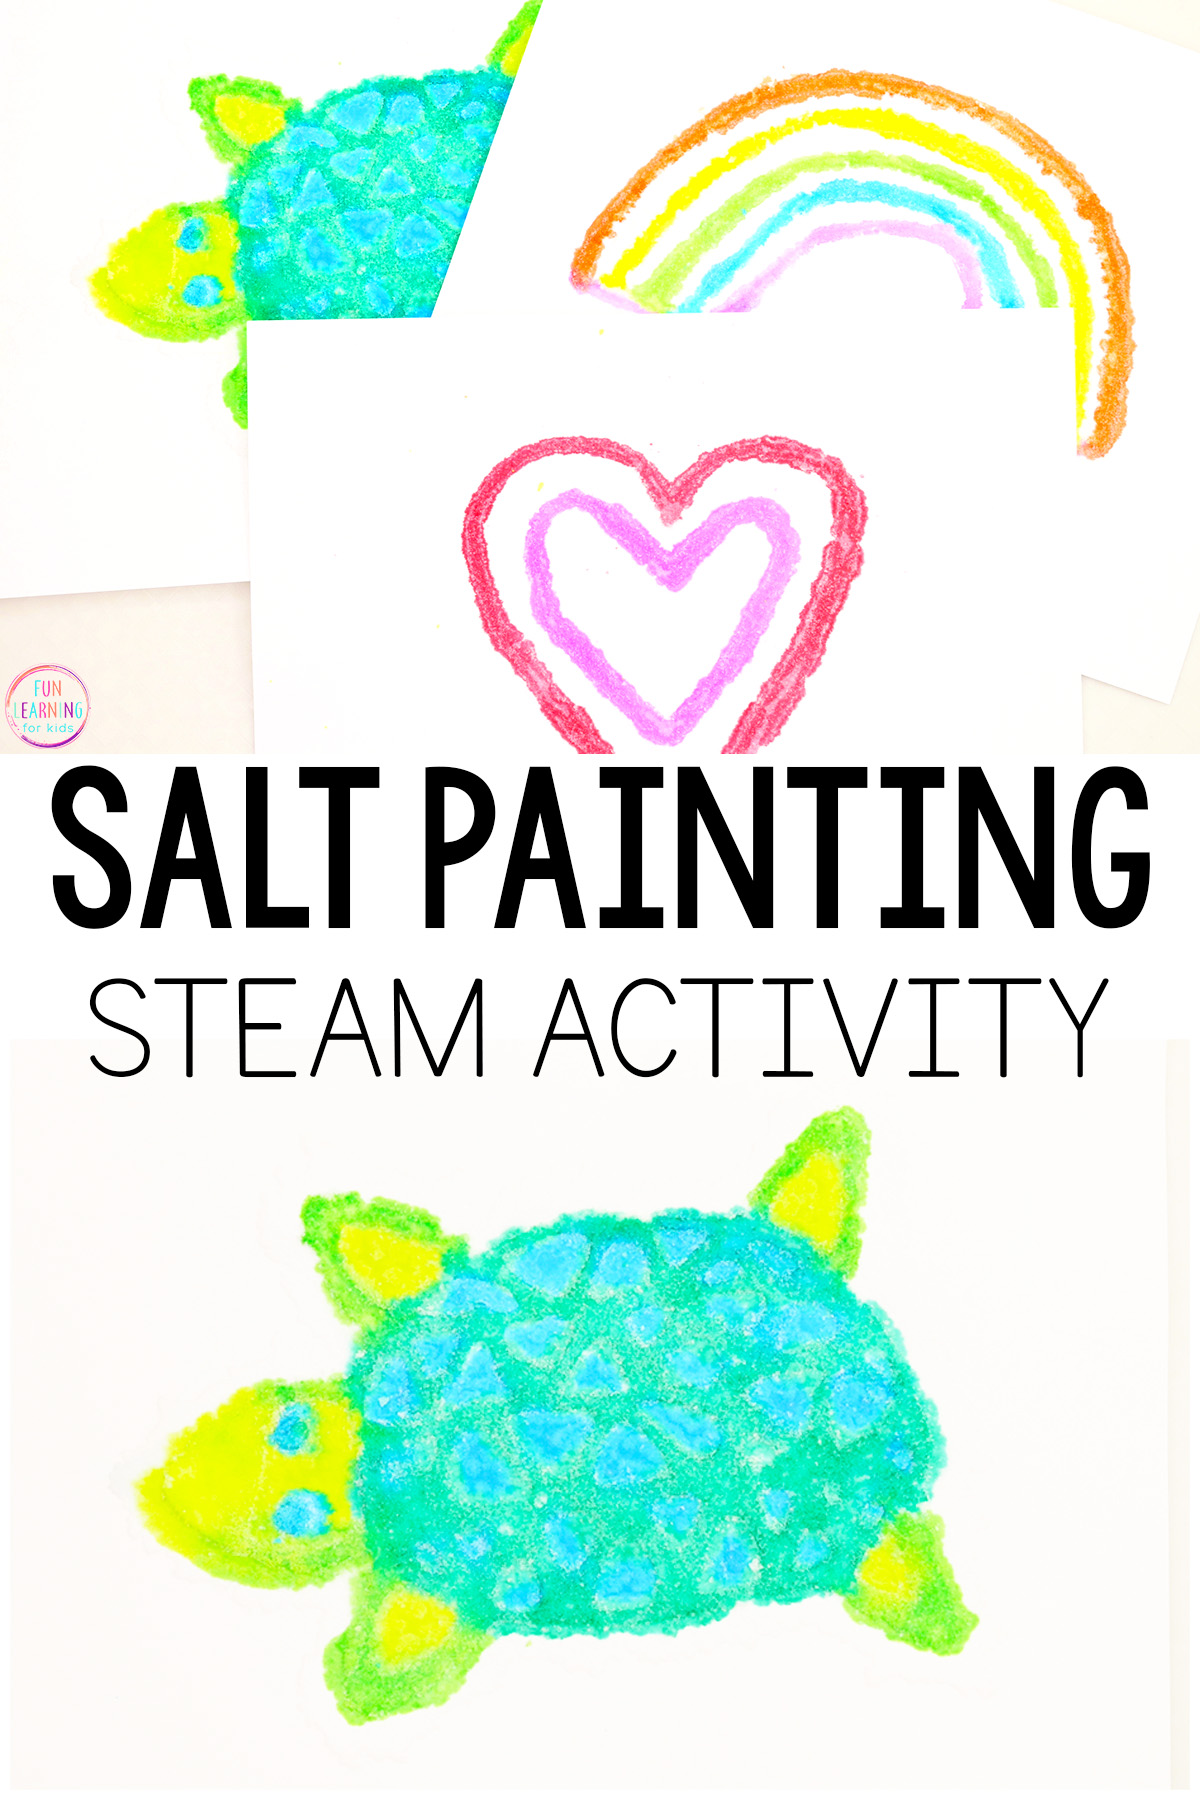
Salt Painting Activity for Kids
Combine science and art with this salt painting STEAM activity! It was an absolute blast for our kids! They loved creating and painting with this fun process art activity. Raised salt painting combines creativity and color to produce stunning results.
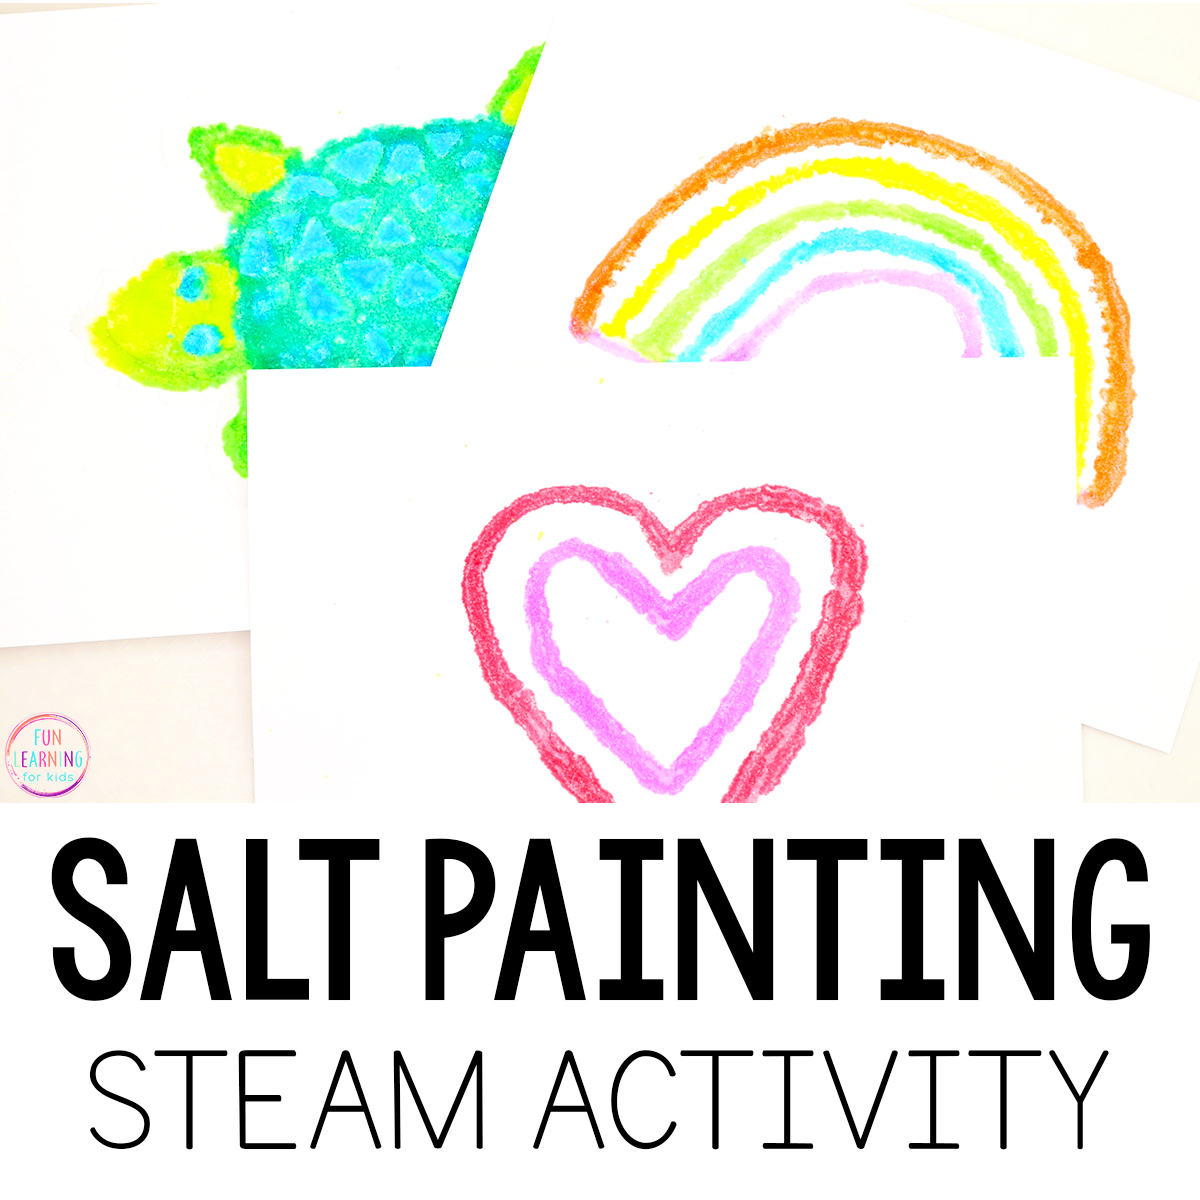
Raised Salt Painting Activity
This is one of our new favorite art projects. The kids loved making several different pieces of art with glue and salt. Once the salt and glue were dry, they tried so many different combinations of fun colors! Read on to find out how to make salt paintings. There are many variations on this activity!
Salt painting is an innovative art form that involves using simple materials to create intricate and vibrant designs.
Our step-by-step guide will take you through this beautiful art activity that combines science and art!
Setting up the Salt Painting Activity
Note: This should be done with adult supervision at all times.
To start, gather the following materials:
- Card stock or watercolor paper
- Salt: Regular table salt works well for this technique.
- White school glue
Then, you will need to decide how you will paint your artwork. Watercolor paint or food coloring? Both are fun options, though we do think the watercolor painting does make the colors more vibrant!
Watercolor Paint Version:
- Liquid watercolors
- Paintbrushes
- Cups of water: Use these to mix with the watercolor paint.
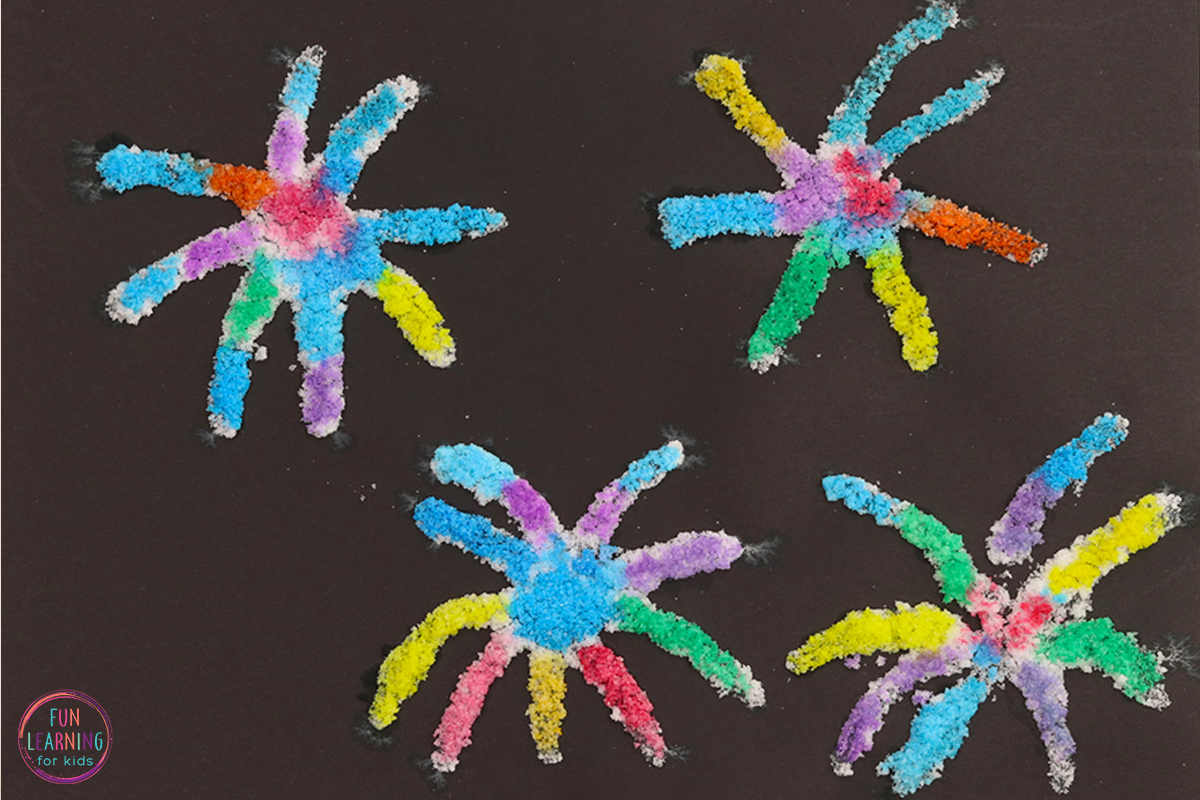
Food Coloring Version:
- Food coloring: Liquid food coloring stands out, but normal food coloring works too.
- Cups of water: Use these to mix the food coloring into.
- Pipettes or droppers
Step-by-Step Instructions
- Prepare Your Workspace: Set up a clean and well-lit area to work in. Cover your surface to prevent any potential spills from staining your area.
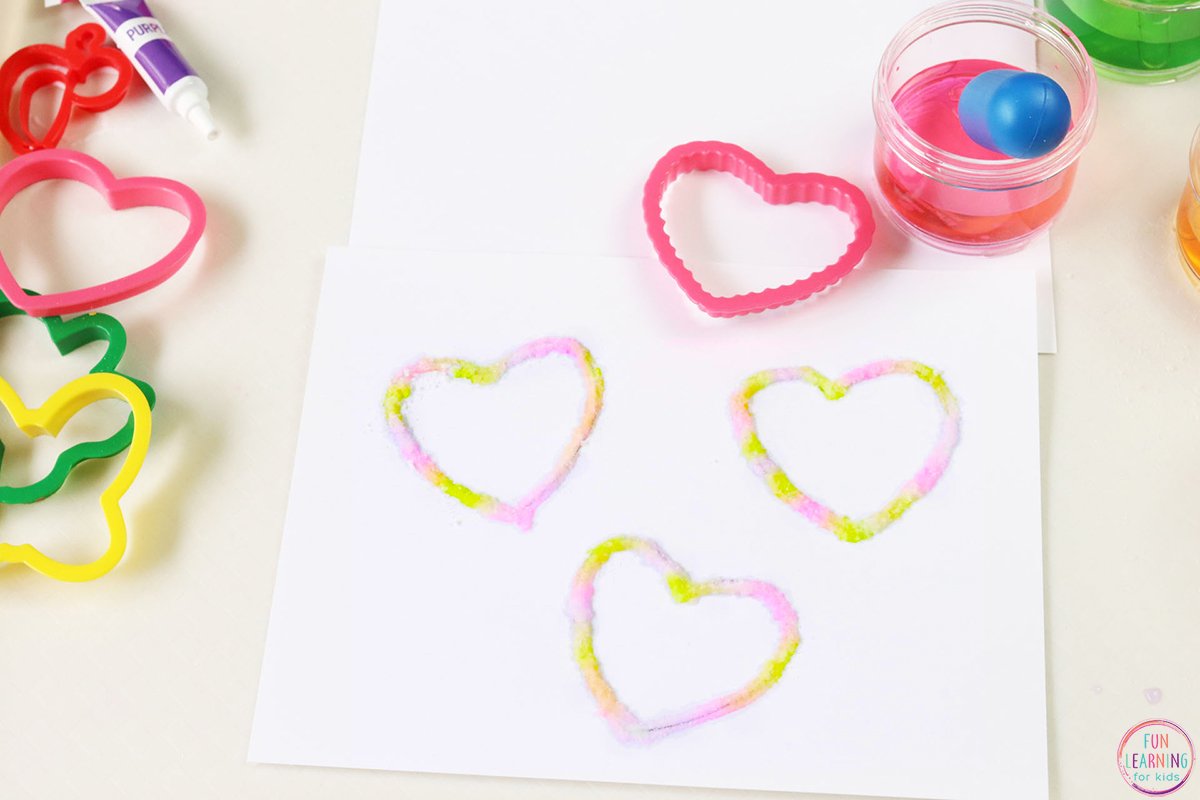
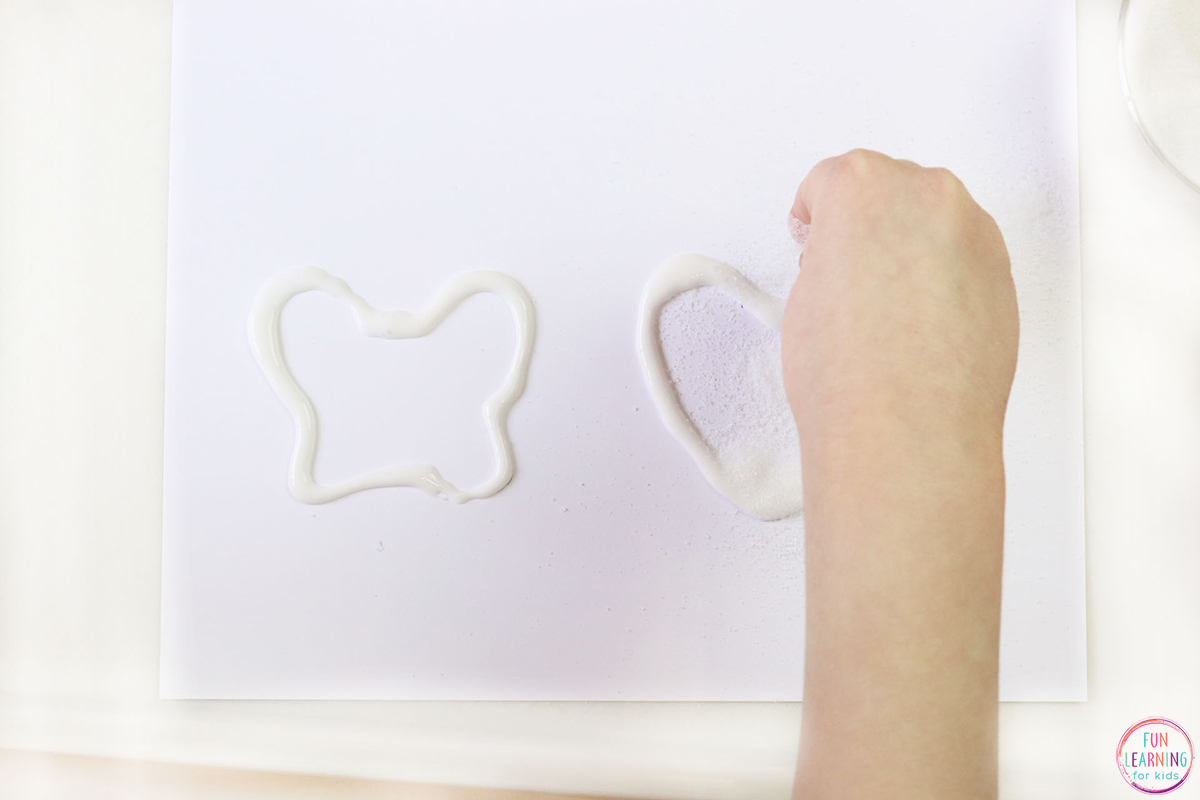
- Design with Glue: Using the glue, your kids will draw their desired design onto the paper. If it helps, have students draw the activity with a pencil first, and then just have them follow the lines as they glue. You can use cookie cutters or stencils for tracing as well.
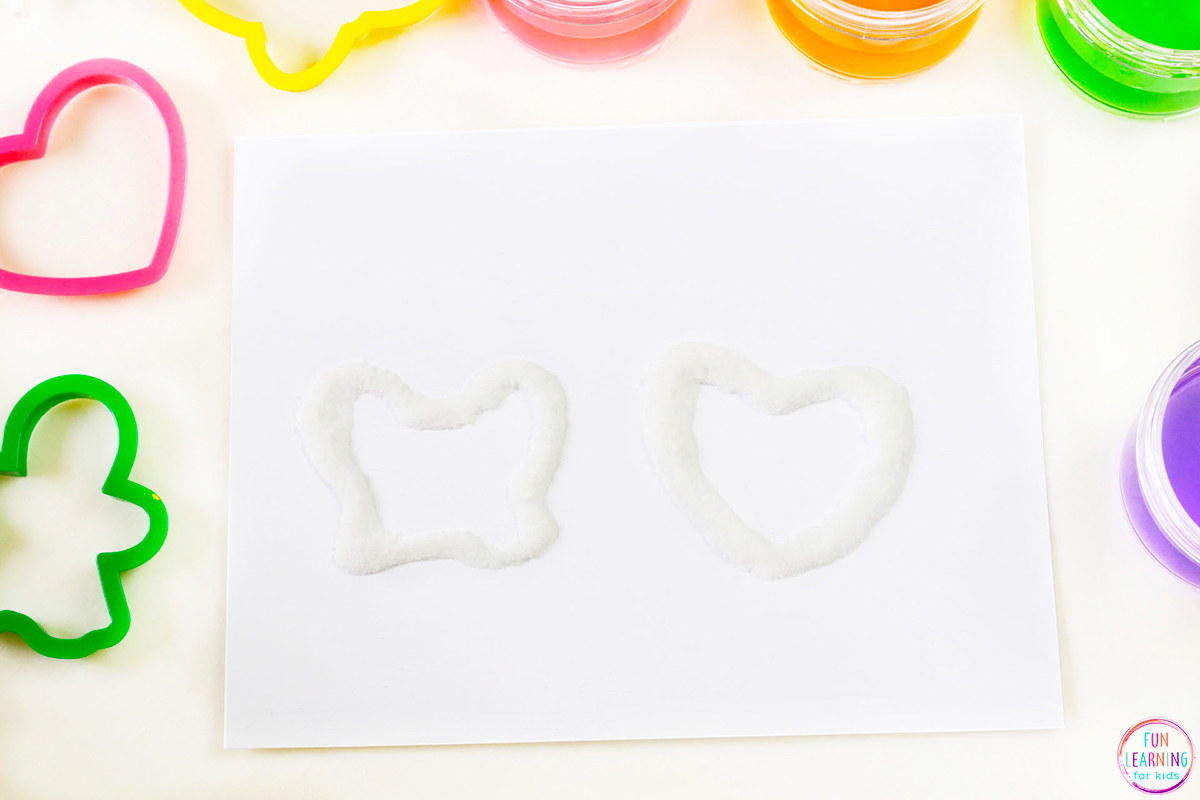
- Add Salt: While the glue is still wet, sprinkle salt over the glued areas. We found that using a little bowl for the salt helped with sprinkling the salt out and they we could shake the excess right back into the bowl. You need to really cover the glue designs thoroughly. You don’t want to miss any of the glue! Dump the salt back into the bowl. You will get the excess salt back for the next drawing this way.
- Let It Dry: Allow your artwork to dry completely before touching it. We found it took about 20 – 30 minutes.
- Remove Excess Salt: Once your painting is dry, gently brush off the excess salt again. We simply took the paper and tilted it sideways over a sink to get the excess salt that didn’t take to the glue after 30 minutes. You can also use a soft brush or your fingertips. This will reveal the intricate designs left behind.
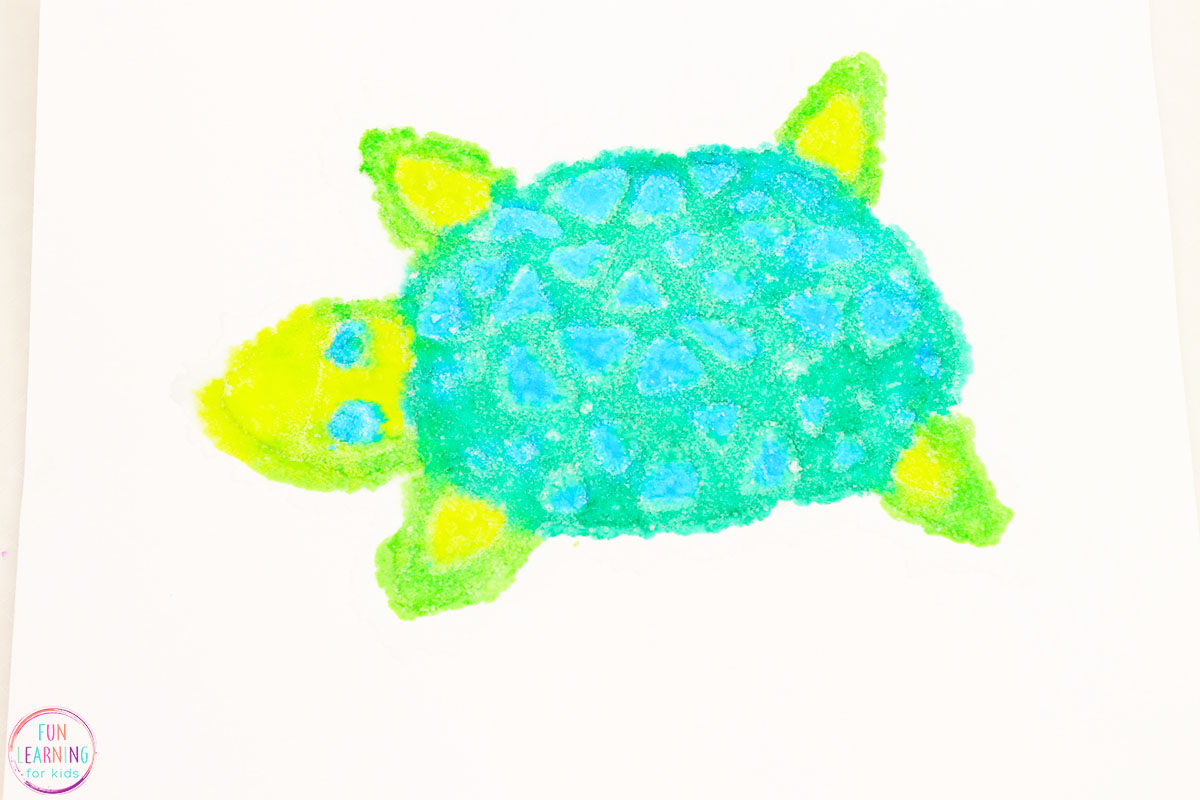
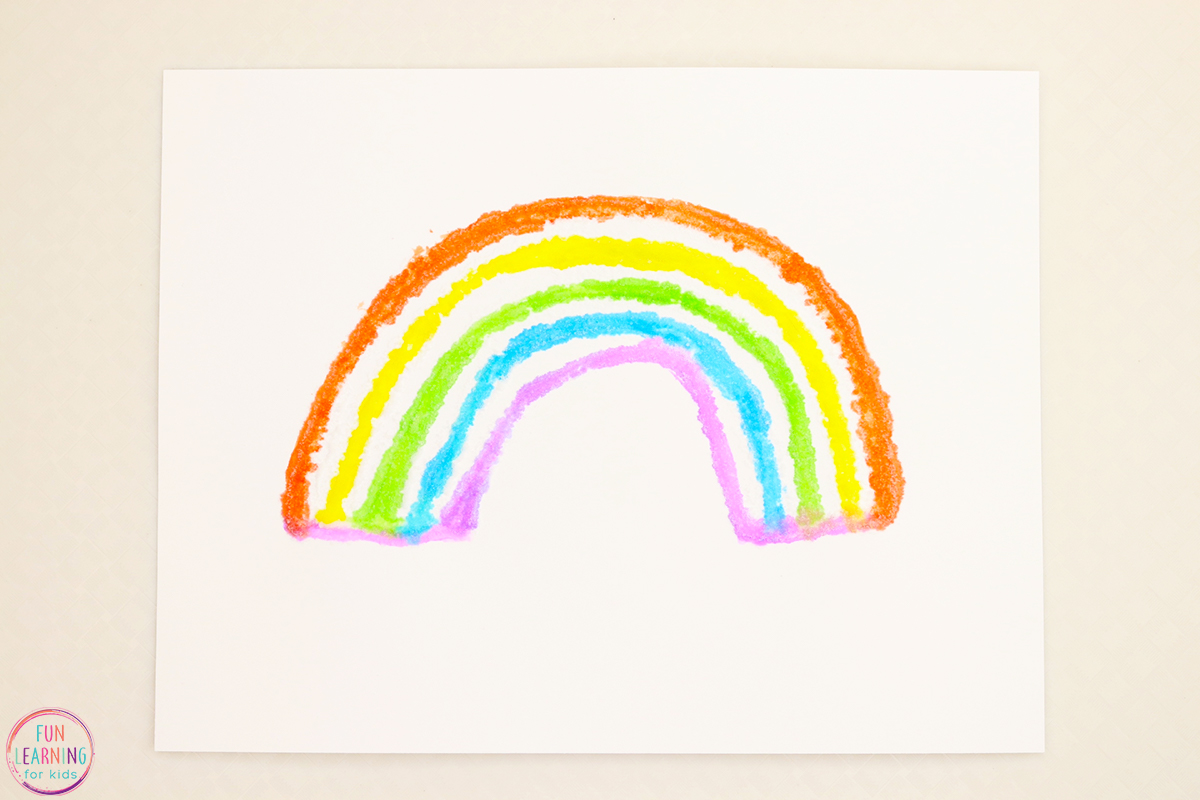
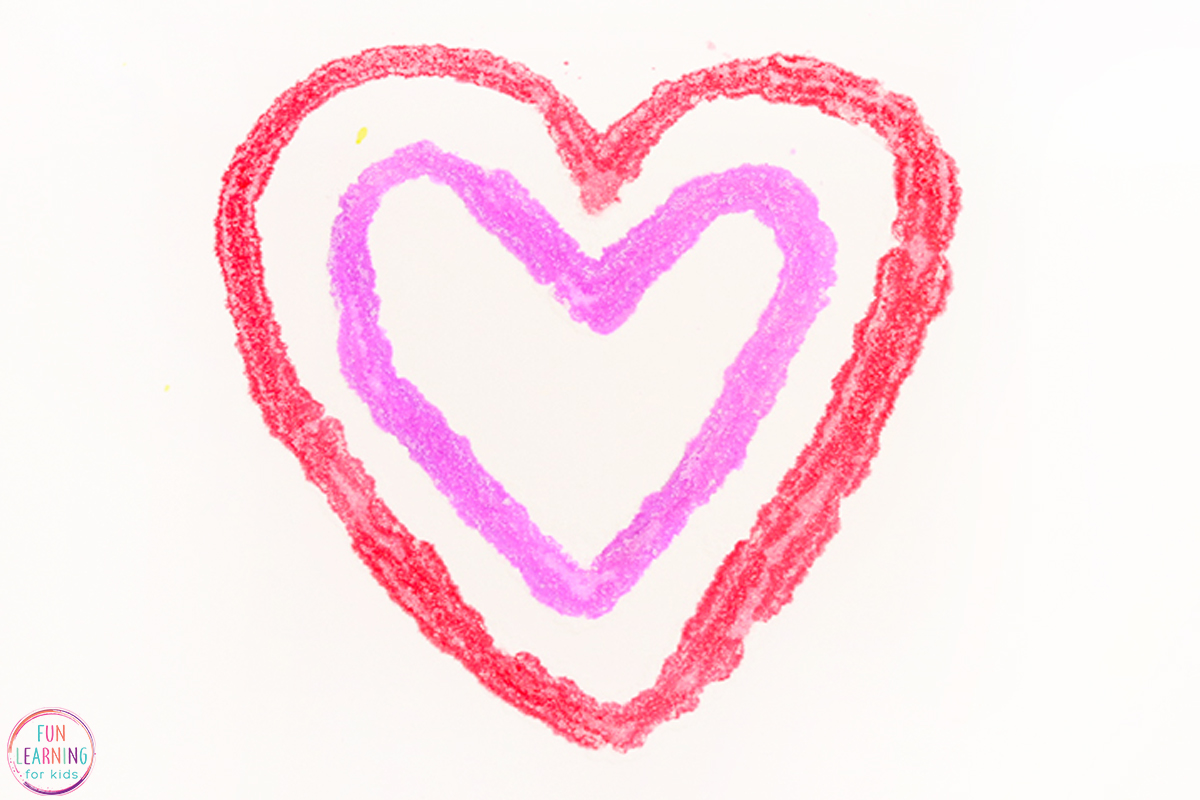
- Paint Your Picture!: For this step, start off with just a tiny bit of water mixed into the watercolors. If you use too much, the water will spill over onto the paper. Just lightly touch the salt lines and the salt will absorb the water! Be creative with your colors on this fun art project!
Food Coloring Variation Instructions
Mix the food colors in separate cups of water. Use a pipette to pick up the colors and gently drop them onto the salt-covered areas. Watch as the colors spread along the salt lines, creating beautiful gradients and textures.
Tips for Creating Salt Paintings
- If you choose the food coloring version, try to use a lot of food coloring to make sure the colors are deeper.
- Don’t use too much glue. We found that when we used more glue, we would get more water spots around the glue outline after it dried. Use a smaller glue bottle to ensure less glue comes out as you trace your activities.
- Less is more. When you first use the watercolor paintbrushes or pipettes use the smallest amount possible. You will see that the salt absorbs the color and it expands.
- Have an extra piece of paper with dried glue and salt available for testing. We used the extra paper to test how much paint we used and to confirm our colors were correct. This helped the kids to be more careful when they added colors to their own paintings.
- Embrace Imperfections. Salt painting is all about embracing the unexpected results that arise from the interaction between salt, glue, and watercolors. Have fun!
The Science Behind the Experiment
Table salt is a hygroscopic substance, which means it can absorb liquid water and water vapor in the air. It doesn’t dissolve when water is added to it, but instead absorbs the water. Watch how your salt absorbs the watercolor while doing this activity.
Questions to Ask
Why do you think the colors are spreading when the food coloring / watercolor paint touches the salt?
Why doesn’t the salt dissolve when water is added to it?
Would sugar work with this experiment? Why or why not?
More Fun Science Experiments and Art for Kids
Your kids will love seeing the Fireworks in a Jar reactions!
This Rainbow Skittles science experiment is a great way to brighten your kids day up!
This catapult activity is a STEM activity that is always a blast!
This fireworks craft is super simple. Keep the kids busy with a fireworks painting activity they’ll love!
This Lava Lamp experiment is always a hit for our kids! You just need water, oil and a surprise third ingredient!
This Fizzy Rainbow Science Experiment will bring fun and color to your kids day!